
Why we need to define scan area ? #
There are 2 weapons and if we define separate scan area , Recoil engine can scan both weapons easily from within these scan area.
Smaller the scan area , faster will be the autodetection as recoil engine won’t have to scan the entire screen.
Setting Up Weapon Scan Area #
Start your Game and Go into training ground.
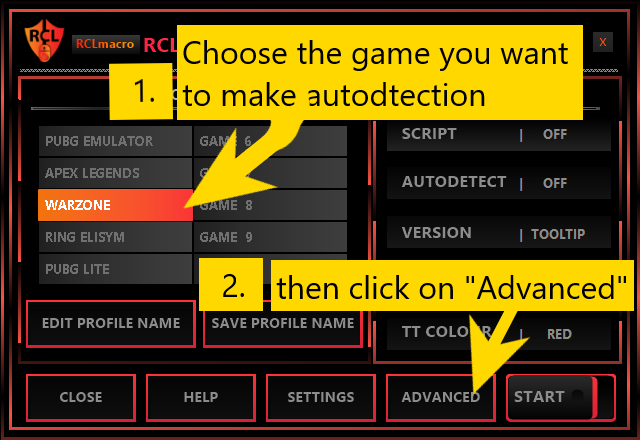
Start the application and choose your game .
then click on advanced to open up autodetection maker for that game.
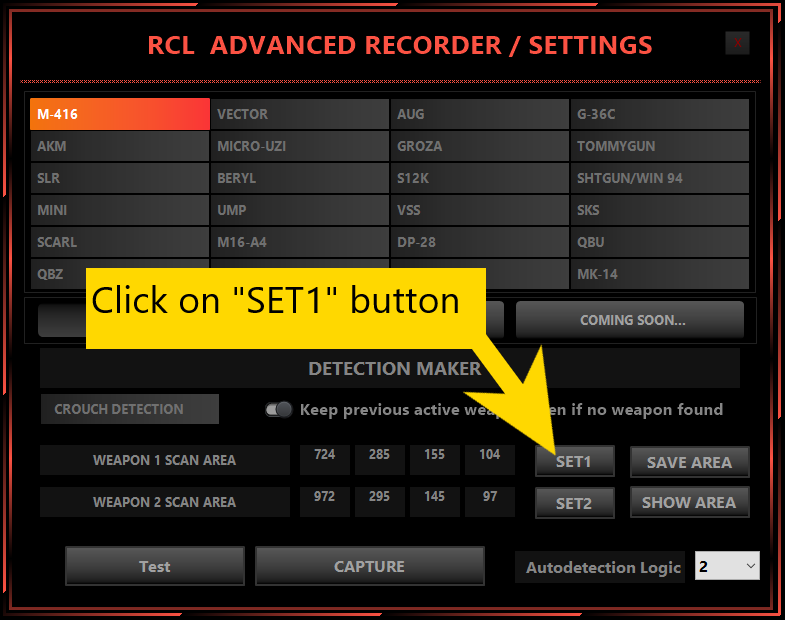
It will open up autodetection maker .
Now click on “Set1” Button
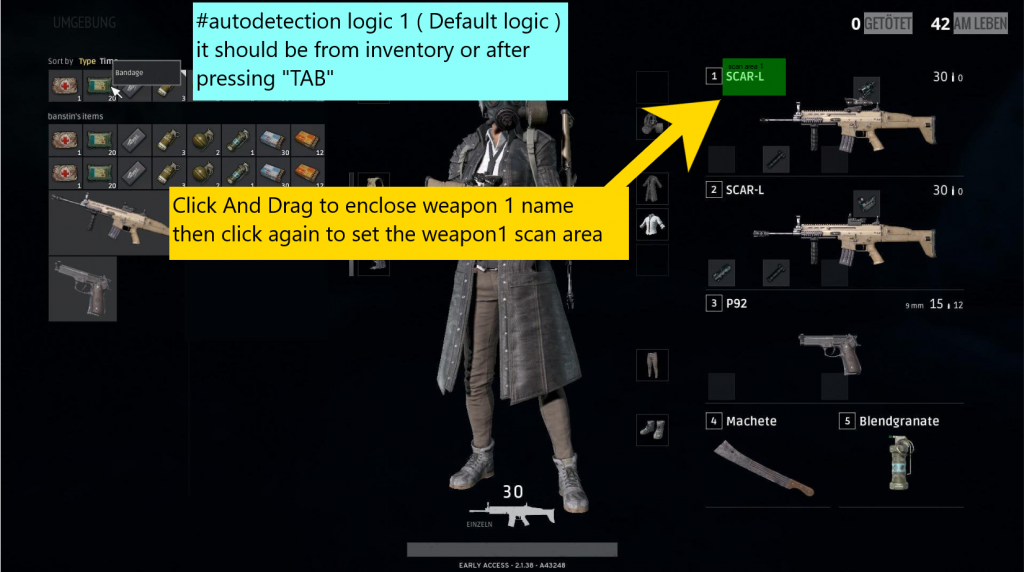
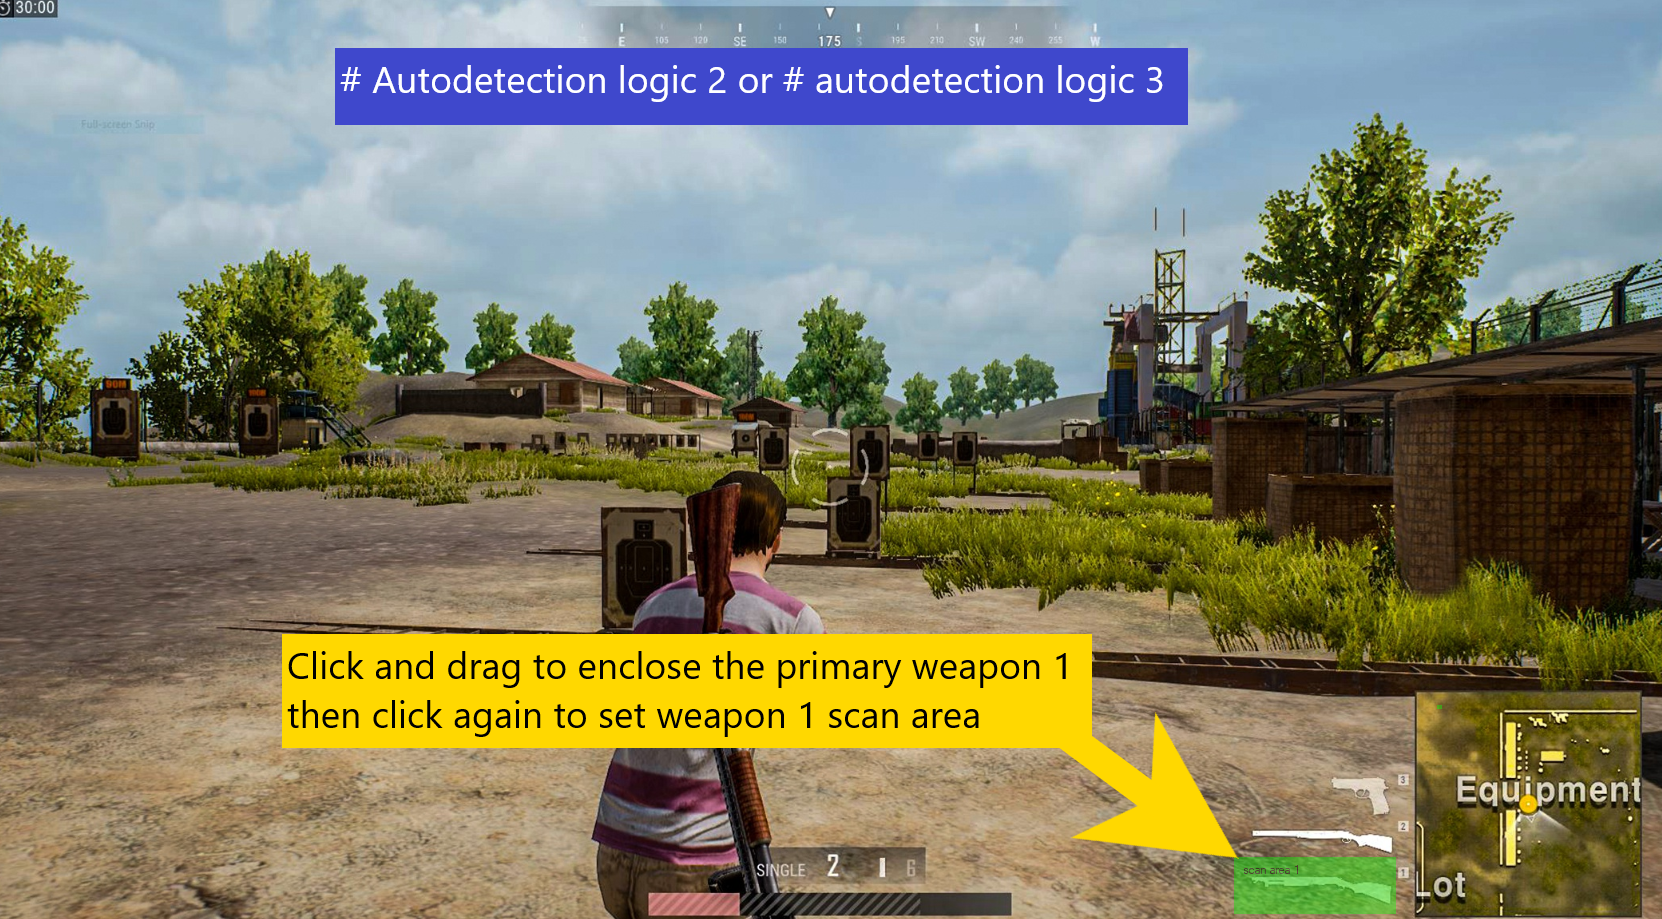
Now Identify something on screen that can be used for detecting weapon , it can be weapon name , or weapon images.
Weapon names are preferred as it will be better in recognition. Weapon images usually have transparency making it hard to recognize
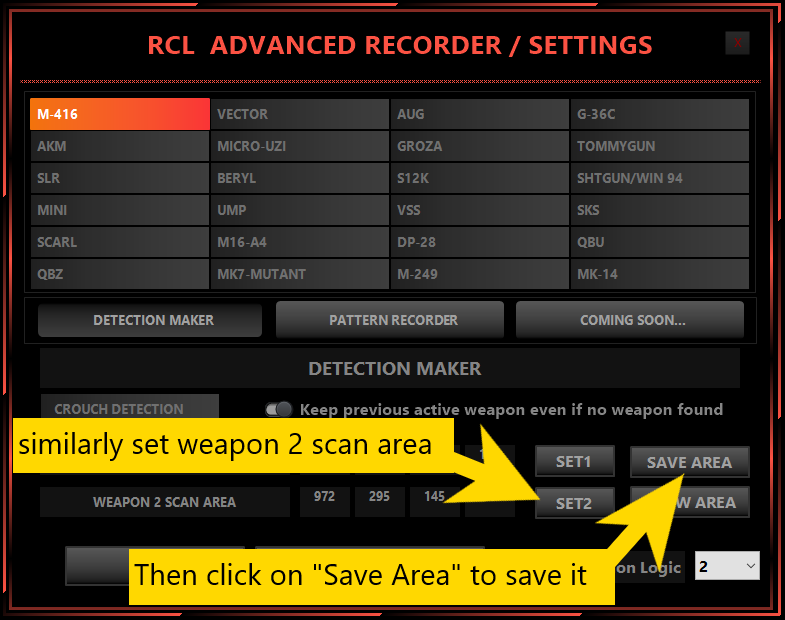
Similarly set weapon 2 scan area by enclosing weapon 2 image or weapon 2 name.
Then Don’t forget to click on “save area” button
Important Note #
# autodetection logic 1 ==> open the game inventory and set scan area from there ( “tab” is the detection trigger )
# autodetection logic 2 ==> you can set scan area on ordinary game play screen. ( ” 1 ” or ” 2 ” or mouse wheel is the detection trigger )
# autodetection logic 3 ==> set the scan area from, screen that is visible after pressing the custom key you defined ( your custom button is the detection trigger )
next we will capture images of the weapons , you should be capturing images from inside these scan area only


